Chat to a clinician
 Find a centre
 Emergency assistance
 Donate now

Registering for headspace events
The process for joining headspace events (eg registration, invite and confirmation emails) looks and feels a bit different. What has changed, and why?
In 2025 headspace moved to a new event planning system that ensures we can:
-
Send you event email communications in a consistent, professional and timely manner using smart automation.
-
Register recipients and record attendance so that we know you have made it to the event.
-
Send you preparation information before events, and post-event resources (where applicable).
Overall, this will provide a better experience when attending events, but we do recognise this is a change. Reach out to the contact person for the event named in the invite or confirmation email if you have any questions or feedback. This will help us develop guidance to add to the frequently asked questions below.
I have received a confirmation email for a headspace event, but the attached calendar invite won’t open or download. What can I do to fix this? (Windows)
Confirmation emails for headspace events include a link to download a calendar file (.ics file type) so you can easily add the event to your calendar. Each file is unique to your registration and helps us ensure you have a seamless experience when you join an event.
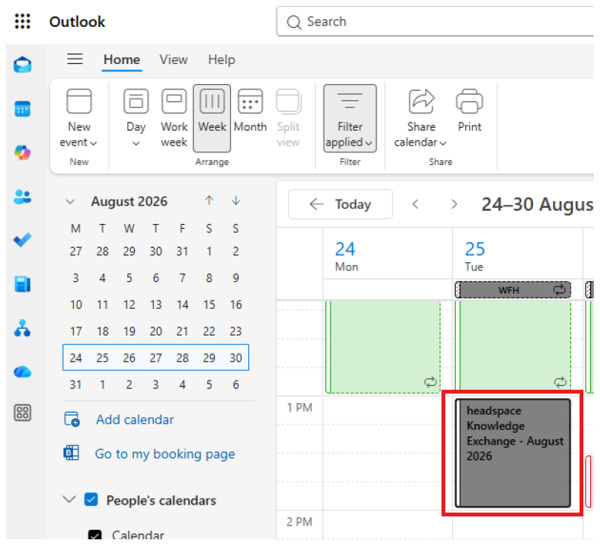
If your calendar file won’t open or save to your Outlook calendar (or other email application), your Windows settings may be the cause. Your machine may be trying to open the calendar file we ask you to download in a different version of Outlook (Example of calendar file when downloaded by your web browser: headspace Knowledge Exchange - August 2026.ics).
Note: If you are working in a headspace centre, PHN or Lead Agency, you may want to share these instructions with your organisation’s IT team so they can ensure all staff have the correct settings. In addition, there are other things your IT team can consider configuring to make your experience with headspace National emails and events smoother. This document is stored securely on ourspace, so you will need to login and download it, then forward it on to your IT team: LA & PHN IT Support email and event calendar guidance Aug 2026.
To fix this issue, follow the simple steps below:
If you’re unable to add the event directly from the email, follow the steps below to manually import the calendar file.
Step 1: Save the .ICS File
- Locate the event confirmation email. It will have a link or button directing you to save or download to your calendar. This will redirect to your default web browser (e.g. Chrome or Edge) and download the calendar file (e.g. headspace Knowledge Exchange - August 2026.ics).
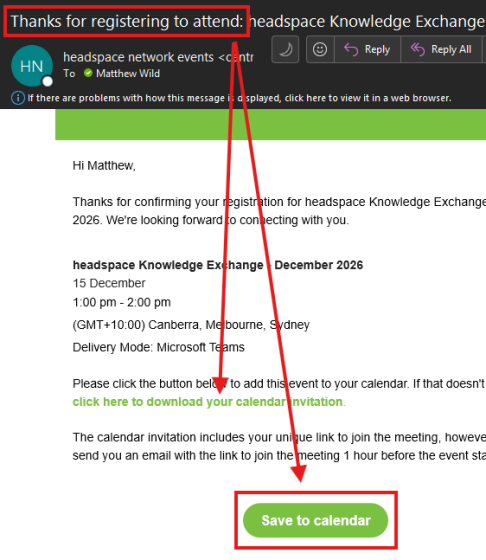
- Ensure you have attempted to open the file directly from your browser downloads.
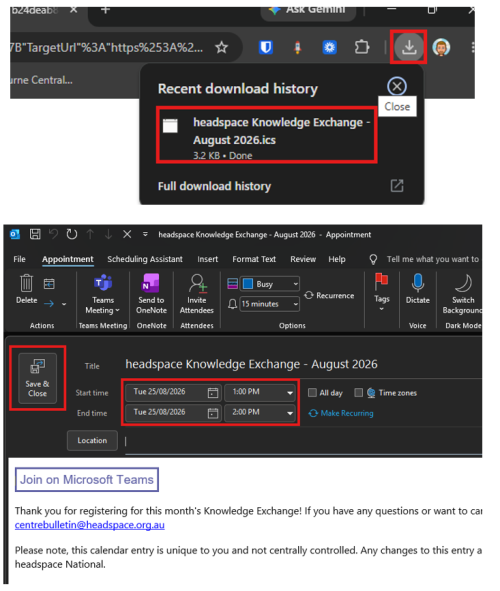
- If the first two steps above did not add it to your Outlook calendar on the specified date/time, then continue with the follow steps.
- Navigate to the downloads folder on your computer where downloaded files usually get saved.
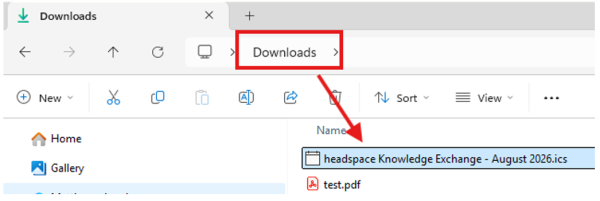
IMPORTANT: Note the file name and save location.
Step 2: Open the Import Tool in Outlook (Classic)
- Open the Outlook Desktop application.
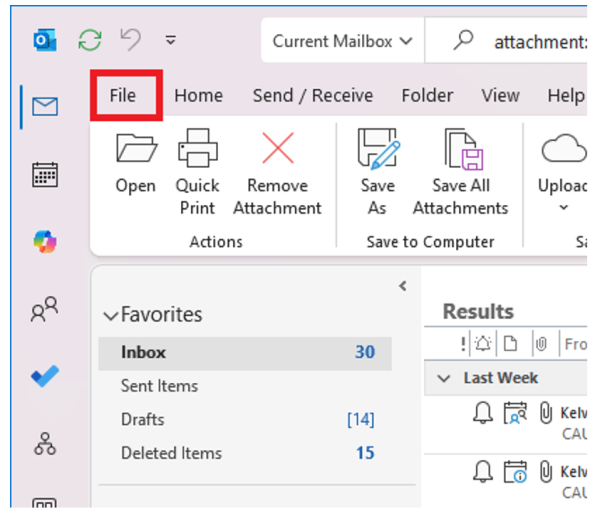
- Click File in the top-left corner.
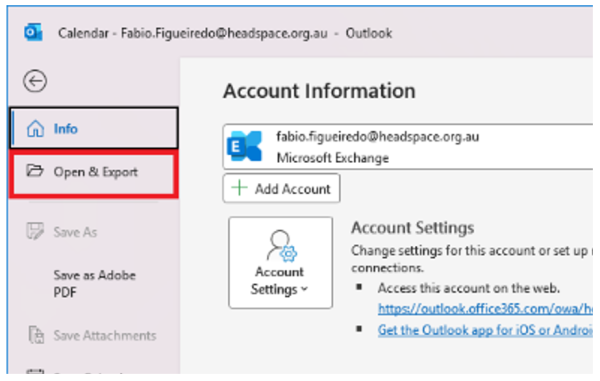
- Select Open & Export from the menu on the left.
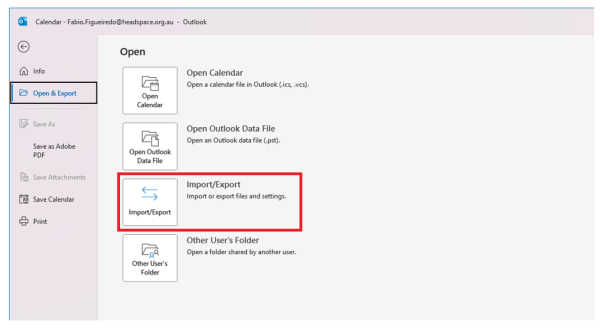
- Click Import/Export.
Step 3: Import the Calendar File
- In the Import and Export Wizard, select:
“Import an iCalendar (.ics) or vCalendar file (.vcs)”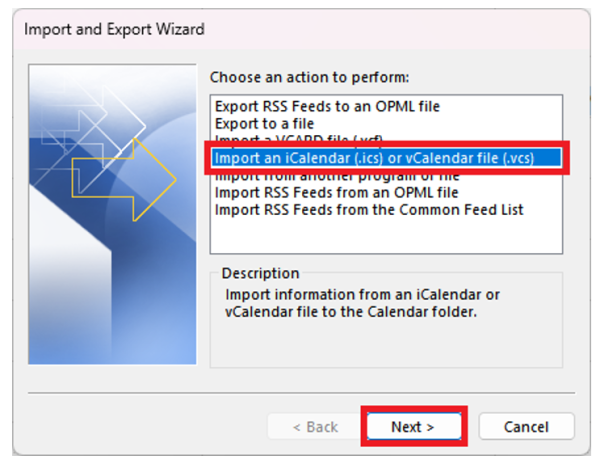
- Click Next.
- Browse to the location where the calendar (.ics) file is saved.
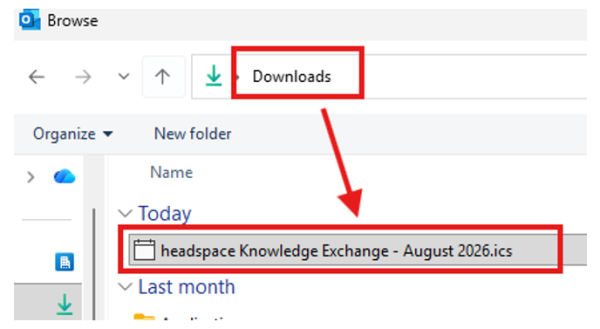
- Select the file and click Open.
Step 4: Choose How to Add the Event
When prompted, select Import to add the event directly to your calendar. 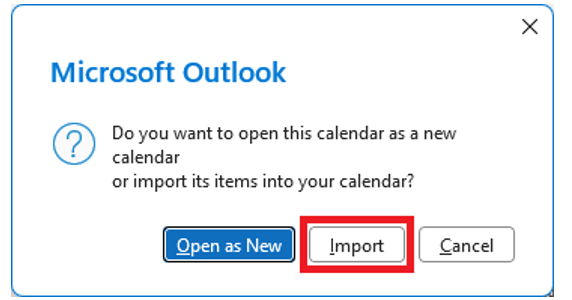
Step 5: Confirm
The event will now appear in your Outlook calendar. 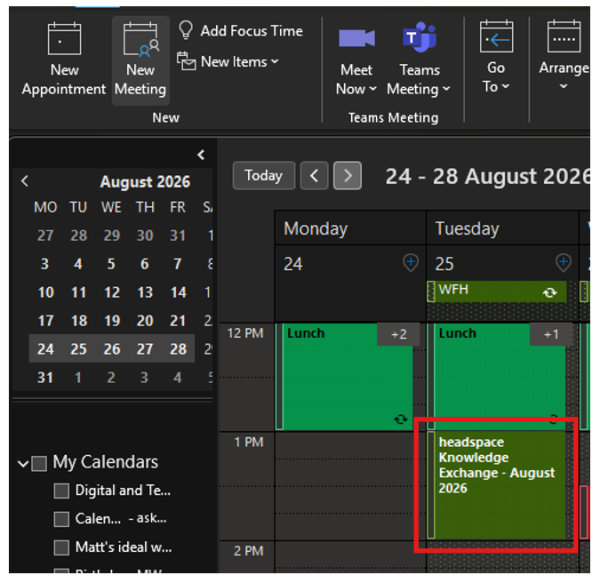
If you’re unable to add the event directly from the email, follow the steps below to manually import the calendar file.
Step 1: Open Outlook on the Web
- Go to https://outlook.office.com
- Sign in with your account and locate the event confirmation email.
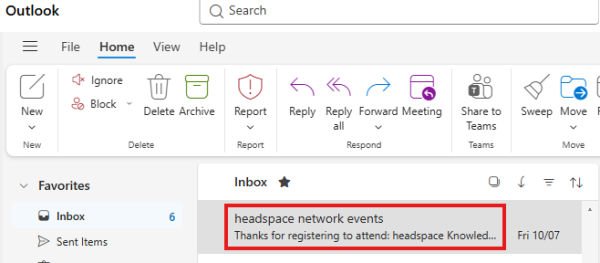
Step 2: Save the .ICS File
- Locate the email containing the event with the .ics attachment.
- Locate the event confirmation email. It will have a link or button directing you to save or download to your calendar. This will download the calendar file (e.g. headspace Knowledge Exchange - August 2026.ics).
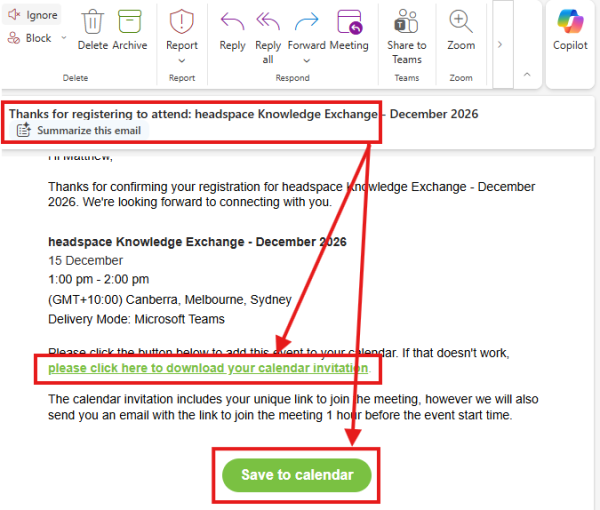
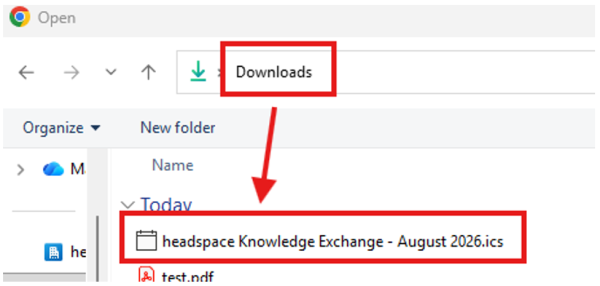
- Make note of the file’s save location (e.g., Downloads folder).
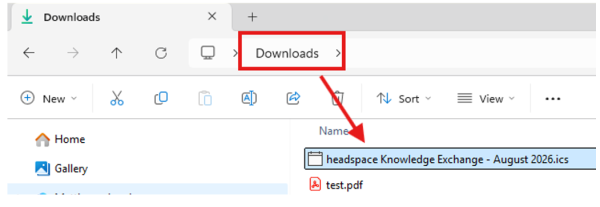
Step 3: Import the Calendar File
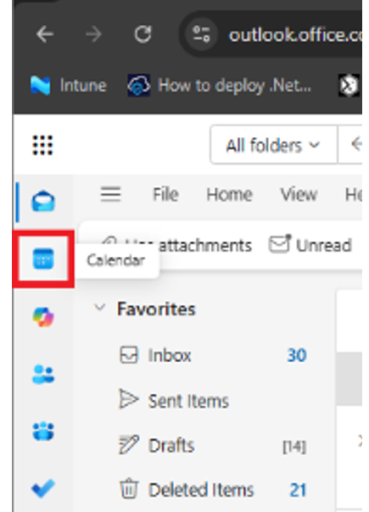
- Select the Calendar icon from the left-hand navigation panel.
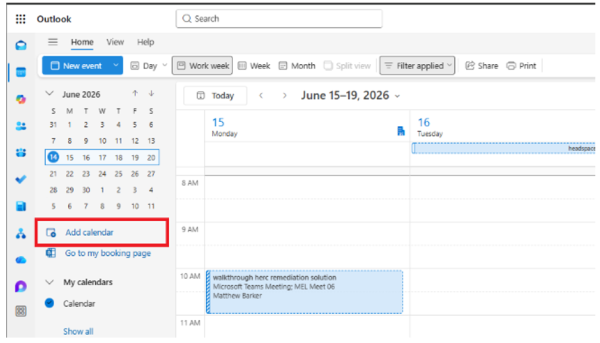
- In the Calendar view, select Add calendar (usually located on the left panel or top menu).
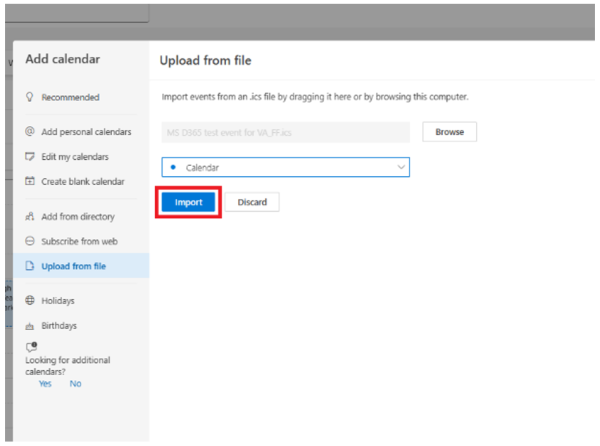
- Choose Upload from file.
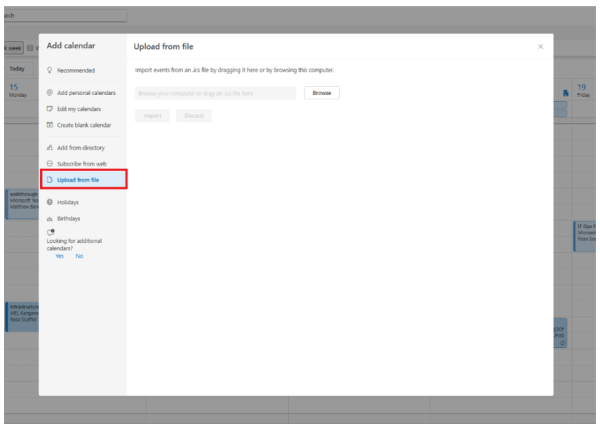
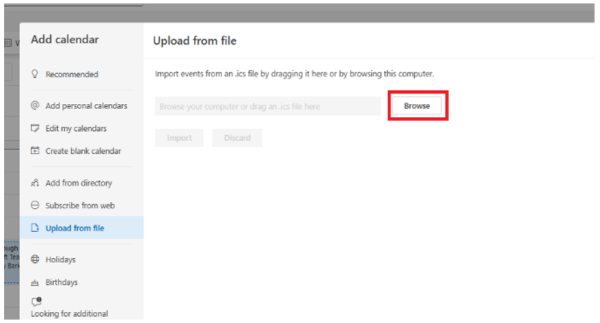
- Click Browse and locate the saved calendar (.ics) file.
- Select the file.
Step 4: Choose Destination Calendar
- Select which calendar you want to add the event to (e.g., your default calendar).
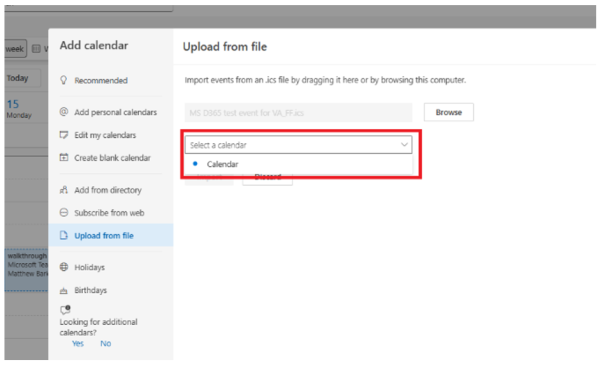
- Click Import.
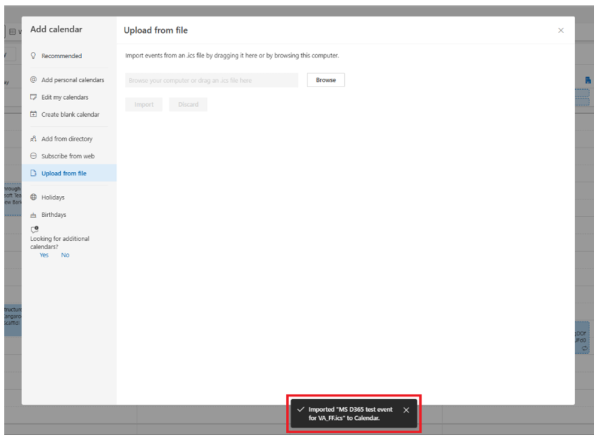
- You will see a message saying "Imported" with a tick.
Step 5: Confirm
The event will now appear in your selected Outlook Web calendar.